NeRF Studio简要教程

Felix Christian Lv2

准备工作

安装NeRF Studio

官方仓库 写的教程已经很详尽了。

1
2
3
4
git clone https://github.com/nerfstudio-project/nerfstudio.git
cd nerfstudio
pip install --upgrade pip setuptools
pip install -e .

值得注意的是,open3d库只支持python 3.8-3.11,博主是用python 3.10安装的依赖。后面租了个服务器用python 3.12,结果找不到相应版本的open3d,建议还是按推荐配置来。

安装tiny-cuda-nn

在训练过程中,终端出现了如下的warning:

1
2
3
4
5
6
7
8
9
10
11
12
13
14
15
16
17
18
19
20
21
22
WARNING: Using a slow implementation for the SHEncoding module. 
🏃 🏃 Install tcnn for speedups 🏃 🏃
pip install git+https://github.com/NVlabs/tiny-cuda-nn/#subdirectory=bindings/torch


WARNING: Using a slow implementation for the NeRFEncoding module.
🏃 🏃 Install tcnn for speedups 🏃 🏃
pip install git+https://github.com/NVlabs/tiny-cuda-nn/#subdirectory=bindings/torch


WARNING: Using a slow implementation for the MLPWithHashEncoding module.
🏃 🏃 Install tcnn for speedups 🏃 🏃
pip install git+https://github.com/NVlabs/tiny-cuda-nn/#subdirectory=bindings/torch

WARNING: Using a slow implementation for the MLP module.
🏃 🏃 Install tcnn for speedups 🏃 🏃
pip install git+https://github.com/NVlabs/tiny-cuda-nn/#subdirectory=bindings/torch


WARNING: Using a slow implementation for the HashEncoding module.
🏃 🏃 Install tcnn for speedups 🏃 🏃
pip install git+https://github.com/NVlabs/tiny-cuda-nn/#subdirectory=bindings/torch

提示你可以用tcnn进行加速。根据它的提示输入指令:

1
pip install git+https://github.com/NVlabs/tiny-cuda-nn/#subdirectory=bindings/torch

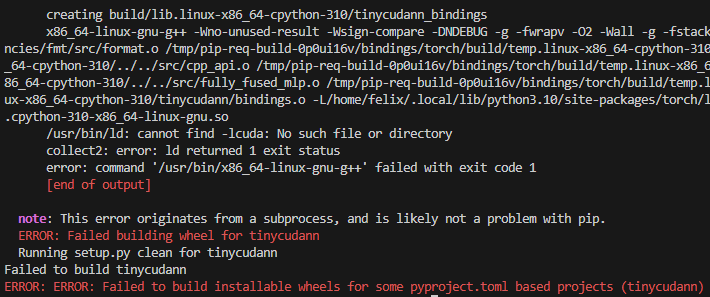
不出意外的话就要出意外了:

error

先是查看了下文档,说是要求 g++ < 11 ,于是安装了g++-9:

1
sudo apt install g++-9

然后切换版本:

1
sudo update-alternatives --install /usr/bin/g++ g++ /usr/bin/g++-9 20

如果有多个版本好像还得执行以下指令切换:

1
sudo update-alternatives --config g++

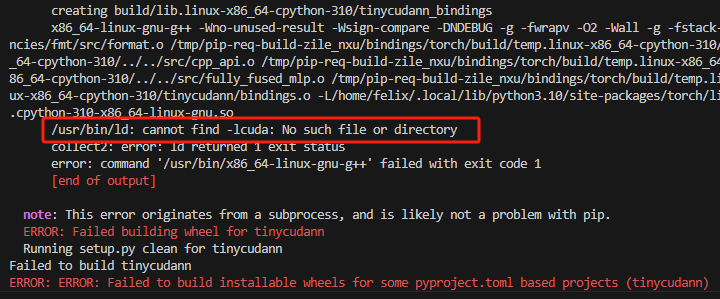
发现还是不行,看报错里有这样一句:

error2

说明问题出在lcuda,g++找不到lcuda。因为博主使用的WSL,cuda库存放在/usr/lib/wsl/lib中,将它复制出来即可:

1
sudo cp /usr/lib/wsl/lib/* /usr/lib

然后再次执行安装就成功了。

值得注意的是,在安装tcnn之前,博主用nerfacto训练30000个step用了两小时,而安装之后仅需20分钟,这个提升还是蛮可观的。

报错及解决方案

使用splatfacto训练报错

1. No CUDA toolkit found.

在使用splatfacto进行训练时报错: error3
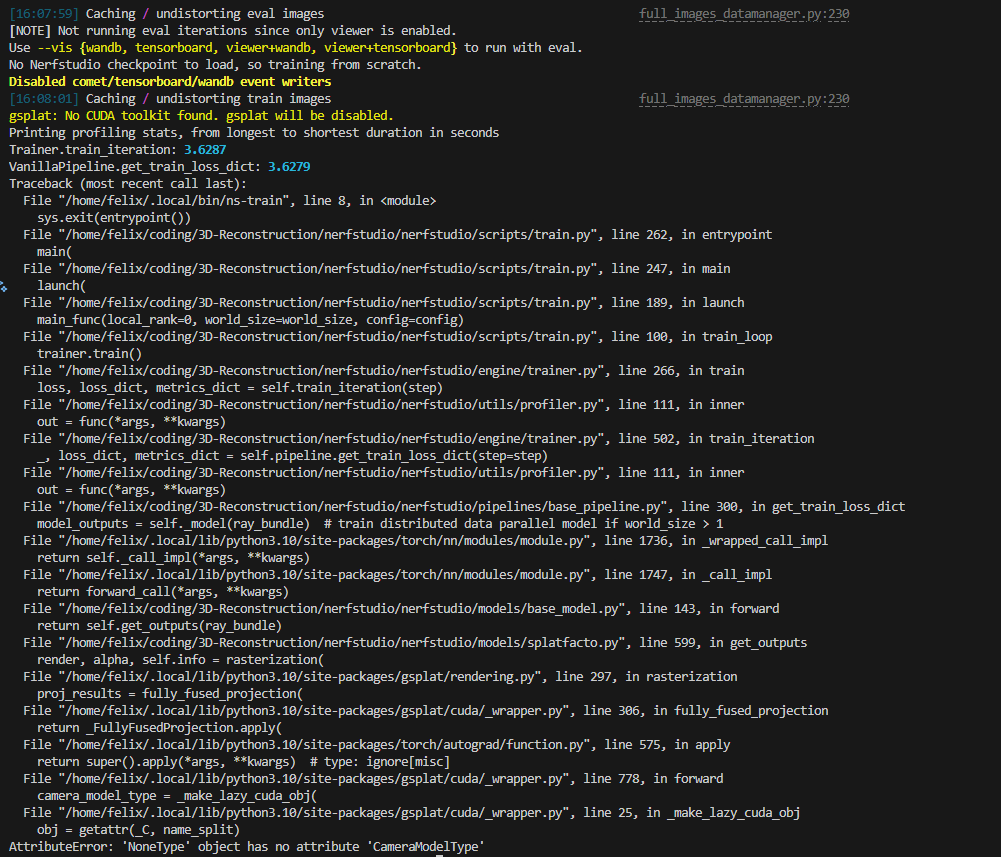
显示CUDA Tookit找不到,然而我的用户目录里是有的。

在github的issue里找到了解决方案:No CUDA toolkit found. gsplat will be disabled. · Issue #249 · nerfstudio-project/gsplat

即,将path添加进去:

1
export PATH=/usr/local/cuda-12.6/bin${PATH:+:${PATH}}

可以将这句添加到~/.bashrc里,每次打开terminal就不用再输入一遍了。

2. ninja: build stopped: subcommand failed.

解决上个问题后结果还是报错:

error4

查阅发现是内存不够,进程直接被kill了。自己的WSL虚拟机内存太少了。尝试租服务器,解决。

使用nerfbusters训练报错(未完全解决)

1. ModuleNotFoundError: No module named 'nerfstudio.fields.visibility_field'

在使用nerfbusters方法时,根据文档中的教程安装nerfbuster之后,简单的使用--help也会出现如下的报错:

1
ModuleNotFoundError: No module named 'nerfstudio.fields.visibility_field'

切换其他基于NeRF的方法,有的依然会出现这个报错。

然后在issue中找到了相似的情况:

Where's nerfstudio VisibilityFIeld come from? · Issue #17 · ethanweber/nerfbusters

from nerfstudio.fields.visibility_field import VisibilityField ModuleNotFoundError: No module named 'nerfstudio.fields.visibility_field' · Issue #3185 · nerfstudio-project/nerfstudio

Visibility Field from Nerfbusters by ethanweber · Pull Request #2264 · nerfstudio-project/nerfstudio

其中提到,他们当前使用的branch是nerfbusters-changes,并没有计划把他合并到main branch。

所以需要克隆他们的nerfbusters-changes branch:

1
git clone -b nerfbusters-changes https://github.com/nerfstudio-project/nerfstudio.git

然后在根目录执行安装:

1
pip install -e .

这样就可以了。

2. `numpy` has no attribute `bool8`. Did you mean: `bool`?

这是因为numpy在1.24更新后将bool8更名为了bool,降级numpy版本即可:

1
pip install numpy==1.23

3. The viewer bridge server subprocess failed.

image-20241126213428268

切换分支后运行原有的方法都会出现如下报错。说是viewer的服务启动失败了,通过--viewer.websocket-port更改窗口依然是相同的报错,于是根据提示查看了log:

image-20241126213554646

好嘛,给我原来的module搞没了,我又回原来的分支重新pip install -e .,然后再运行。
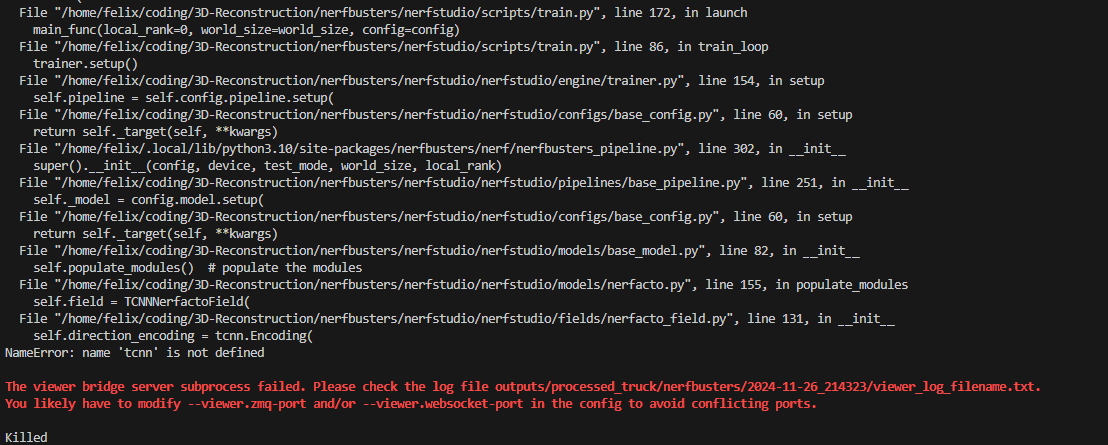
image-20241126214834818

闹鬼了,我不玩了行吧,nerfbusters给劳资滚!😠

使用zipnerf报错

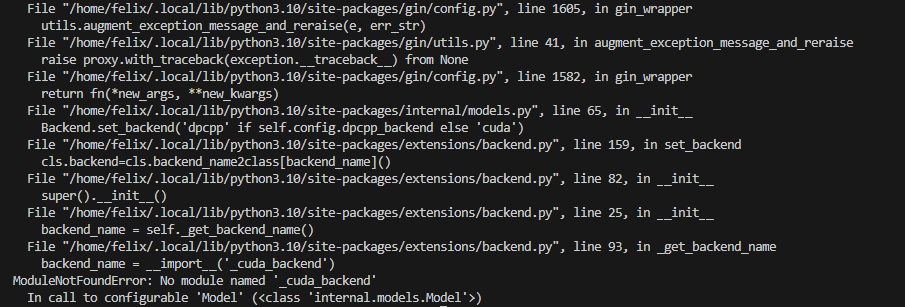
1. ERROR: Failed building wheel for cuda_backend 或者 No module named '_cuda_backend'

在使用

1
pip install git+https://github.com/SuLvXiangXin/zipnerf-pytorch#subdirectory=extensions/cuda

安装依赖的时候,出现如下报错:

image-20241126233030691

开始没有管他,直到最后训练的时候又弹出报错:

image-20241126233117488

看样子是逃不掉了。

2. AssertionError: pipeline.datamanager.dataparser...

image-20241126233225832

第一次出现这长串报错是因为参数没输对,第二次问gpt说是与 tyro 版本有关,尝试升级 tyro 库以及相关依赖:

1
pip install --upgrade tyro

然后看到error怂了:

image-20241126233430107

于是又改回了推荐的版本:

1
pip install tyro==2.13.3

然后再运行就可以了。

3. AssertionError: Colmap path data/processed_truck/sparse/0 does not exist.

这个原因是zipnerf用的数据集格式和nerfstudio好像不完全一致,我用了下tandt的数据集发现可行,但是它会对图像先进行一次下采样。

1
2
3
4
5
6
7
8
9
10
11
12
13
14
15
16
17
18
19
20
21
22
23
24
25
26
27
28
29
30
31
32
33
34
35
36
37
38
39
40
41
42
43
44
45
46
47
48
49
50
51
52
53
54
55
56
57
58
59
60
61
62
63
64
65
66
67
68
69
70
71
72
73
74
75
76
77
78
79
80
81
(nerf2mesh) root@I1dc2923c3f00801cdf:~/3D-Reconstruction/nerf2mesh# python main.py nerfstudio/poster/ --workspace trial_syn_poster/ -O --bound 1 --scale 0.8 --dt_gamma 0 --stage 0 --lambda_tv 1e-8
Warning:
Unable to load the following plugins:

libio_e57.so: libio_e57.so does not seem to be a Qt Plugin.

Cannot load library /usr/local/miniconda3/envs/nerf2mesh/lib/python3.10/site-packages/pymeshlab/lib/plugins/libio_e57.so: (/usr/lib/x86_64-linux-gnu/libp11-kit.so.0: undefined symbol: ffi_type_pointer, version LIBFFI_BASE_7.0)

Loading train data: 100%|██████████████████████████████████████████████████████████████████████████████████████████████████████████████████████████████████████████████████████████████████████████████████████████████████████████████████████████████████████████████████████████████████| 225/225 [00:08<00:00, 25.09it/s]
[INFO] max_epoch 134, eval every 26, save every 2.
[INFO] Trainer: ngp_stage0 | 2024-11-26_15-12-23 | cuda | fp16 | trial_syn_poster/
[INFO] #parameters: 18367240
Namespace(path='nerfstudio/poster/', O=True, workspace='trial_syn_poster/', seed=0, stage=0, ckpt='latest', fp16=True, sdf=False, tcnn=False, progressive_level=False, test=False, test_no_video=False, test_no_mesh=False, camera_traj='', data_format='nerf', train_split='train', preload=True, random_image_batch=True,
downscale=1, bound=1.0, scale=0.8, offset=[0, 0, 0], mesh='', enable_cam_near_far=False, enable_cam_center=False, min_near=0.05, enable_sparse_depth=False, enable_dense_depth=False, iters=30000, lr=0.01, lr_vert=0.0001, pos_gradient_boost=1, cuda_ray=True, max_steps=1024, update_extra_interval=16,
max_ray_batch=4096, grid_size=128, mark_untrained=True, dt_gamma=0.0, density_thresh=10, diffuse_step=1000, diffuse_only=False, background='random', enable_offset_nerf_grad=False, n_eval=5, n_ckpt=50, num_rays=4096, adaptive_num_rays=True, num_points=262144, lambda_density=0, lambda_entropy=0, lambda_tv=1e-08,
lambda_depth=0.1, lambda_specular=1e-05, lambda_eikonal=0.1, lambda_rgb=1, lambda_mask=0.1, wo_smooth=False, lambda_lpips=0, lambda_offsets=0.1, lambda_lap=0.001, lambda_normal=0, lambda_edgelen=0, contract=False, patch_size=1, trainable_density_grid=False, color_space='srgb', ind_dim=0, ind_num=500,
mcubes_reso=512, env_reso=256, decimate_target=300000.0, mesh_visibility_culling=True, visibility_mask_dilation=5, clean_min_f=8, clean_min_d=5, ssaa=2, texture_size=4096, refine=True, refine_steps_ratio=[0.1, 0.2, 0.3, 0.4, 0.5, 0.7], refine_size=0.01, refine_decimate_ratio=0.1, refine_remesh_size=0.02,
vis_pose=False, gui=False, W=1000, H=1000, radius=5, fovy=50, max_spp=1, refine_steps=[3000, 6000, 9000, 12000, 15000, 21000])
NeRFNetwork(
(encoder): GridEncoder: input_dim=3 num_levels=16 level_dim=1 resolution=16 -> 2048 per_level_scale=1.3819 params=(6119864, 1) gridtype=hash align_corners=False interpolation=linear
(sigma_net): MLP(
(net): ModuleList(
(0): Linear(in_features=19, out_features=32, bias=False)
(1): Linear(in_features=32, out_features=1, bias=False)
)
)
(encoder_color): GridEncoder: input_dim=3 num_levels=16 level_dim=2 resolution=16 -> 2048 per_level_scale=1.3819 params=(6119864, 2) gridtype=hash align_corners=False interpolation=linear
(color_net): MLP(
(net): ModuleList(
(0): Linear(in_features=35, out_features=64, bias=False)
(1): Linear(in_features=64, out_features=64, bias=False)
(2): Linear(in_features=64, out_features=6, bias=False)
)
)
(specular_net): MLP(
(net): ModuleList(
(0): Linear(in_features=6, out_features=32, bias=False)
(1): Linear(in_features=32, out_features=3, bias=False)
)
)
)
[INFO] Loading latest checkpoint ...
[WARN] No checkpoint found, abort loading latest model.
Loading val data: 100%|████████████████████████████████████████████████████████████████████████████████████████████████████████████████████████████████████████████████████████████████████████████████████████████████████████████████████████████████████████████████████████████████████████| 1/1 [00:00<00:00, 21.10it/s]
[mark untrained grid] 9364 from 2097152
==> Start Training Epoch 1, lr=0.000100 ...
... ...
loss=0.091703 (0.104557) lr=0.004555: : 100% 225/225 [00:03<00:00, 69.94it/s]
==> Finished Epoch 133, loss = 0.078408.
==> Start Training Epoch 134, lr=0.001006 ...
loss=0.075468 (0.078282) lr=0.000988: : 100% 225/225 [00:04<00:00, 52.46it/s]
==> Finished Epoch 134, loss = 0.078282.
[INFO] training takes 10.078925 minutes.
Setting up [LPIPS] perceptual loss: trunk [vgg], v[0.1], spatial [off]
/usr/local/miniconda3/envs/nerf2mesh/lib/python3.10/site-packages/torchvision/models/_utils.py:208: UserWarning: The parameter 'pretrained' is deprecated since 0.13 and may be removed in the future, please use 'weights' instead.
warnings.warn(
/usr/local/miniconda3/envs/nerf2mesh/lib/python3.10/site-packages/torchvision/models/_utils.py:223: UserWarning: Arguments other than a weight enum or `None` for 'weights' are deprecated since 0.13 and may be removed in the future. The current behavior is equivalent to passing `weights=VGG16_Weights.IMAGENET1K_V1`. You can also use `weights=VGG16_Weights.DEFAULT` to get the most up-to-date weights.
warnings.warn(msg)
Downloading: "https://download.pytorch.org/models/vgg16-397923af.pth" to /root/.cache/torch/hub/checkpoints/vgg16-397923af.pth
100%|██████████████████████████████████████████████████████████████████████████████████████████████████████████████████████████████████████████████████████████████████████████████████████████████████████████████████████████████████████████████████████████████████████████████████████| 528M/528M [35:11<00:00, 262kB/s]
Loading model from: /usr/local/miniconda3/envs/nerf2mesh/lib/python3.10/site-packages/lpips/weights/v0.1/vgg.pth
++> Evaluate at epoch 134 ...
loss=0.213495 (0.213495): : 100% 1/1 [00:00<00:00, 1.07it/s]
PSNR = 6.706122
LPIPS (vgg) = 0.767062
++> Evaluate epoch 134 Finished, loss = 0.213495
==> Start Test, save results to trial_syn_poster/results
100% 11/11 [00:03<00:00, 3.40it/s]Traceback (most recent call last):
File "/root/3D-Reconstruction/nerf2mesh/main.py", line 263, in <module>
trainer.test(test_loader, write_video=True) # test and save video
File "/root/3D-Reconstruction/nerf2mesh/nerf/utils.py", line 1005, in test
imageio.mimwrite(os.path.join(save_path, f'{name}_rgb.mp4'), all_preds, fps=24, quality=8, macro_block_size=1)
File "/usr/local/miniconda3/envs/nerf2mesh/lib/python3.10/site-packages/imageio/v2.py", line 494, in mimwrite
with imopen(uri, "wI", **imopen_args) as file:
File "/usr/local/miniconda3/envs/nerf2mesh/lib/python3.10/site-packages/imageio/core/imopen.py", line 281, in imopen
raise err_type(err_msg)
ValueError: Could not find a backend to open `trial_syn_poster/results/ngp_stage0_ep0134_rgb.mp4`` with iomode `wI`.
Based on the extension, the following plugins might add capable backends:
FFMPEG: pip install imageio[ffmpeg]
pyav: pip install imageio[pyav]
100% 11/11 [00:04<00:00, 2.67it/s]

运行结果

nerfacto和splatfacto渲染效果对比

由于背景场景太过杂乱,在导出的时候选择了crop一下,只保留了主体。

对于基于NeRF的方法nerfacto,可以选择导出点云或者网格。导出的网格在meshlab进行可视化,效果如下:
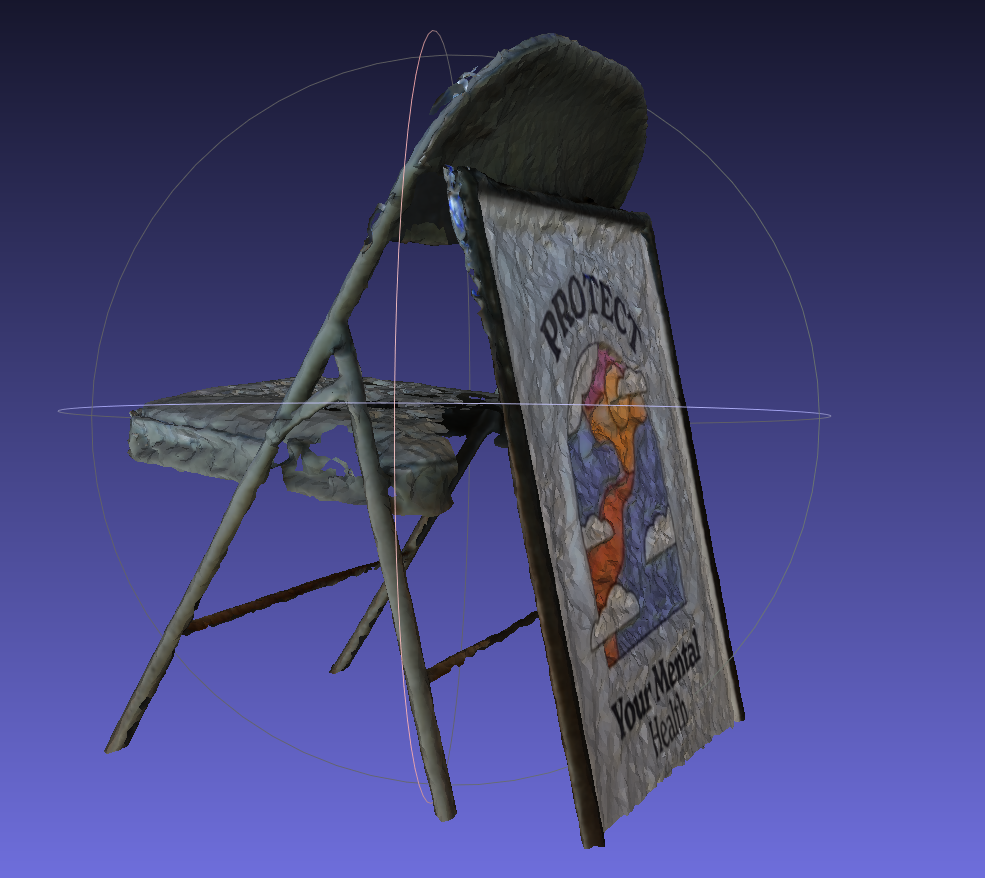
nerfacto

可以看到,poster的内容是比较清晰地还原出来了,然而椅子的形状结构却有些损坏,尤其是越靠近中心缺损越严重。

而对于基于3DGS的方法splatfacto,它只能选择导出gaussian splat。为了对其进行可视化,选择使用了 supersplat 这个工具:
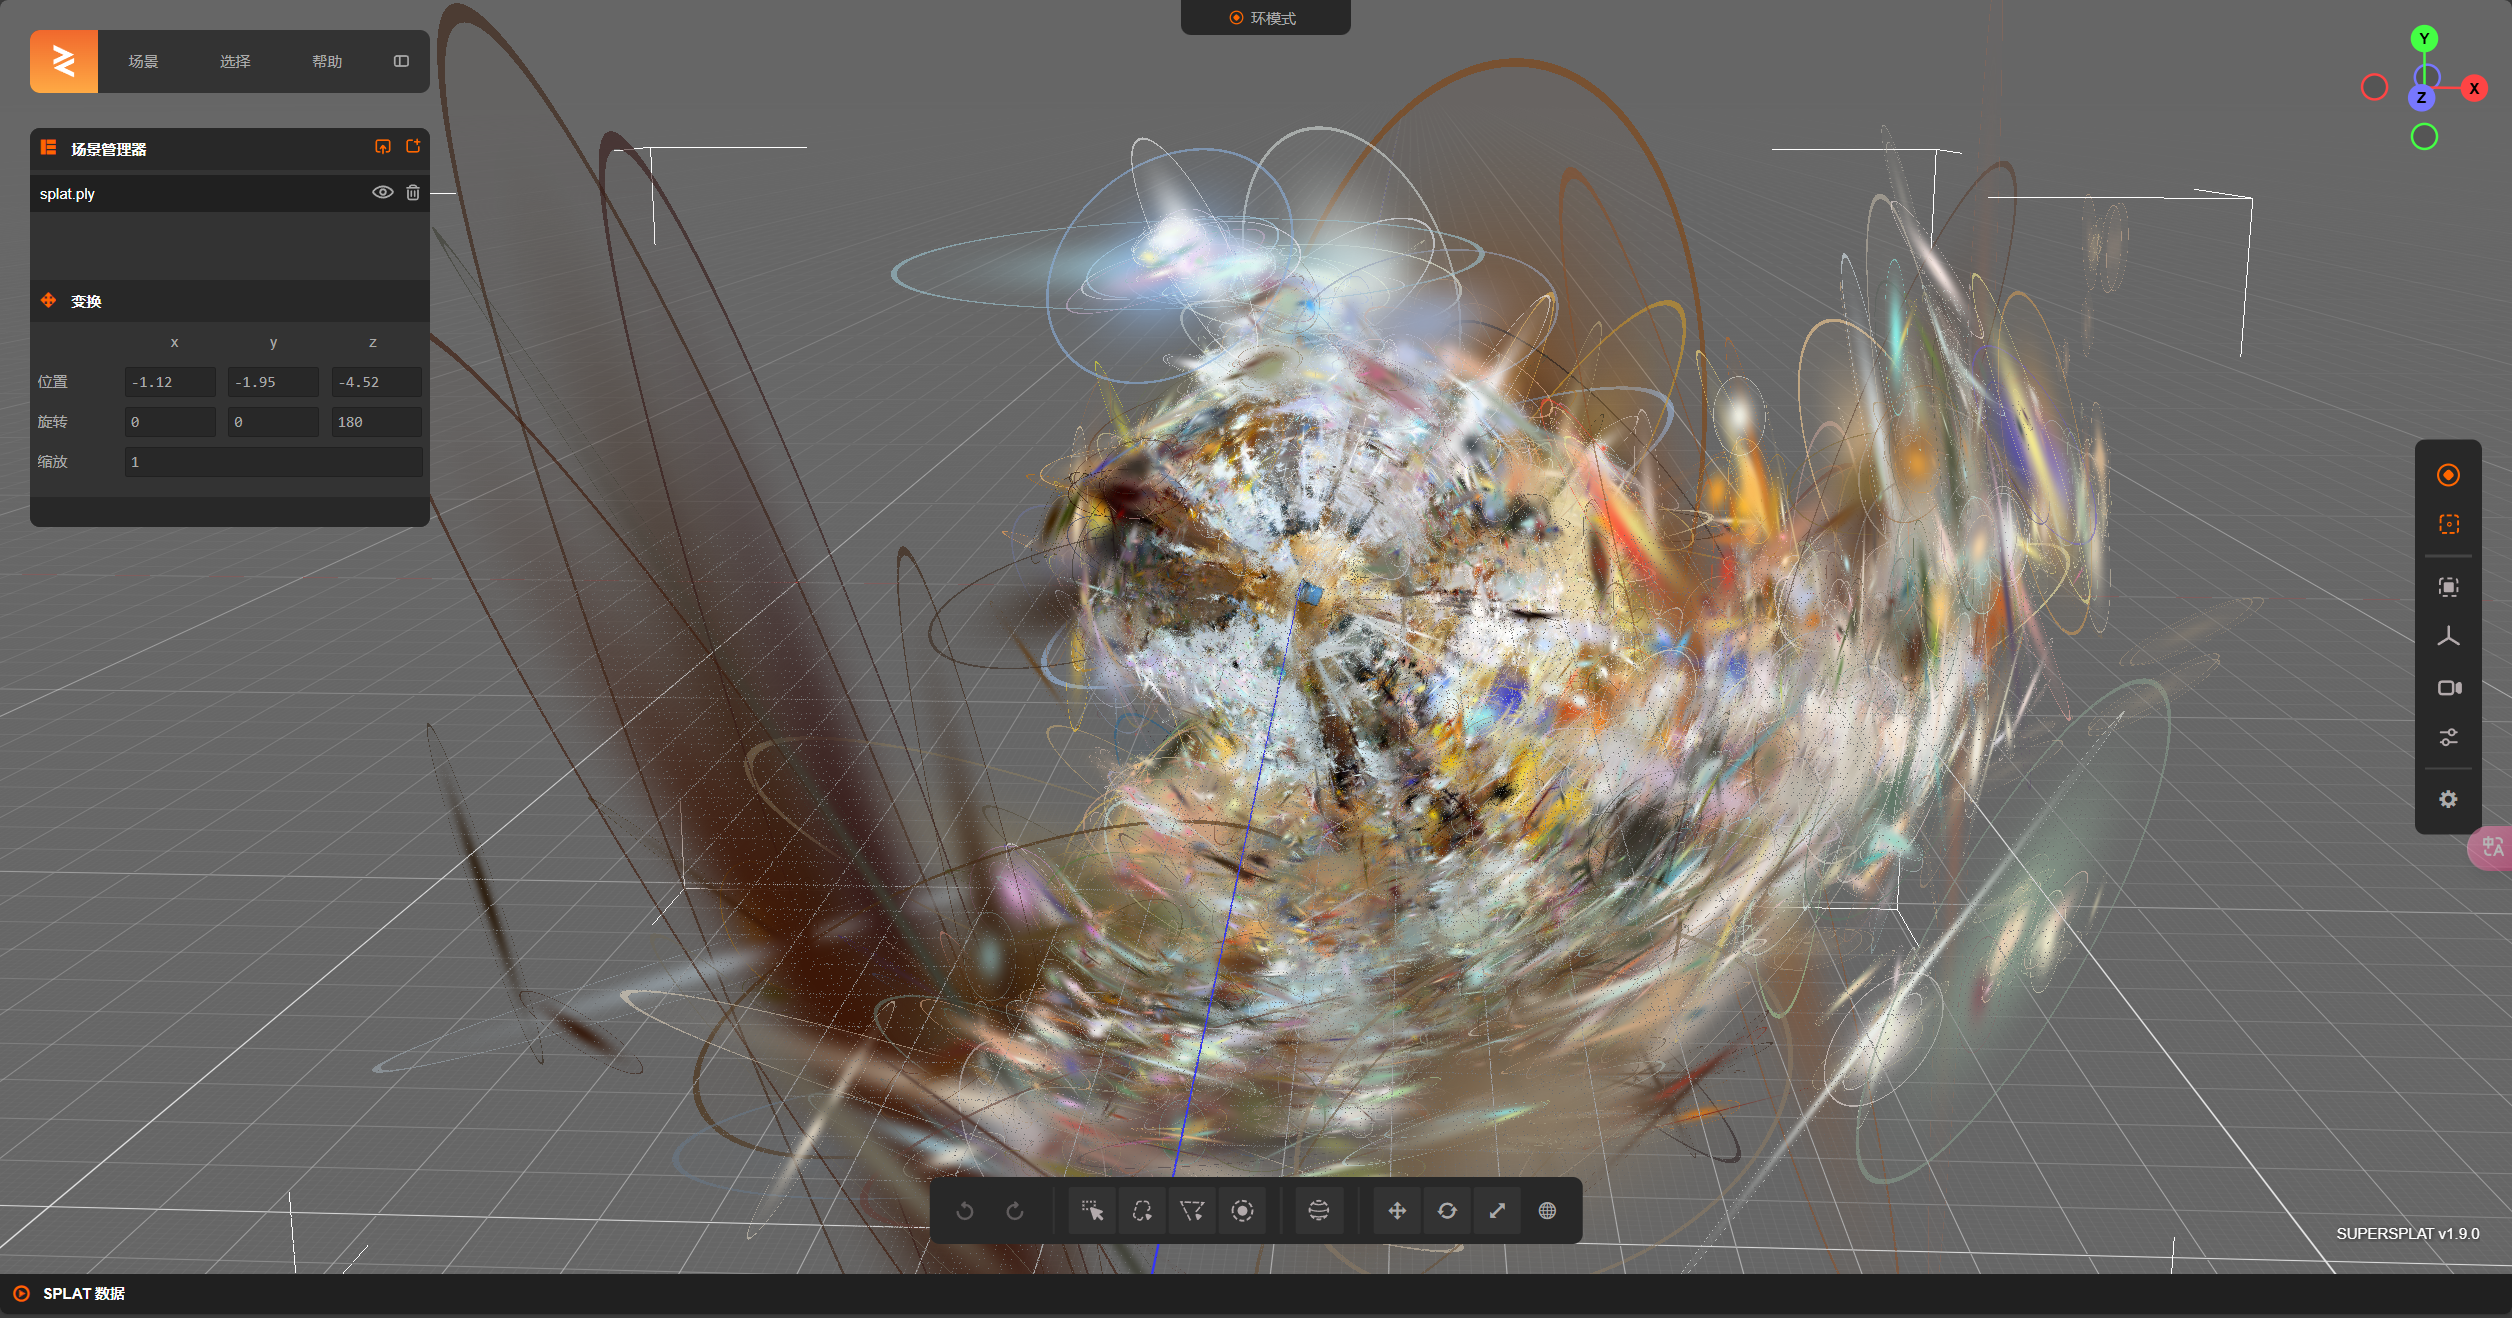
1

可以看到,除了中心的主体外,为了渲染出背景,在即便是很远的地方也生成了很多个gaussian splat。
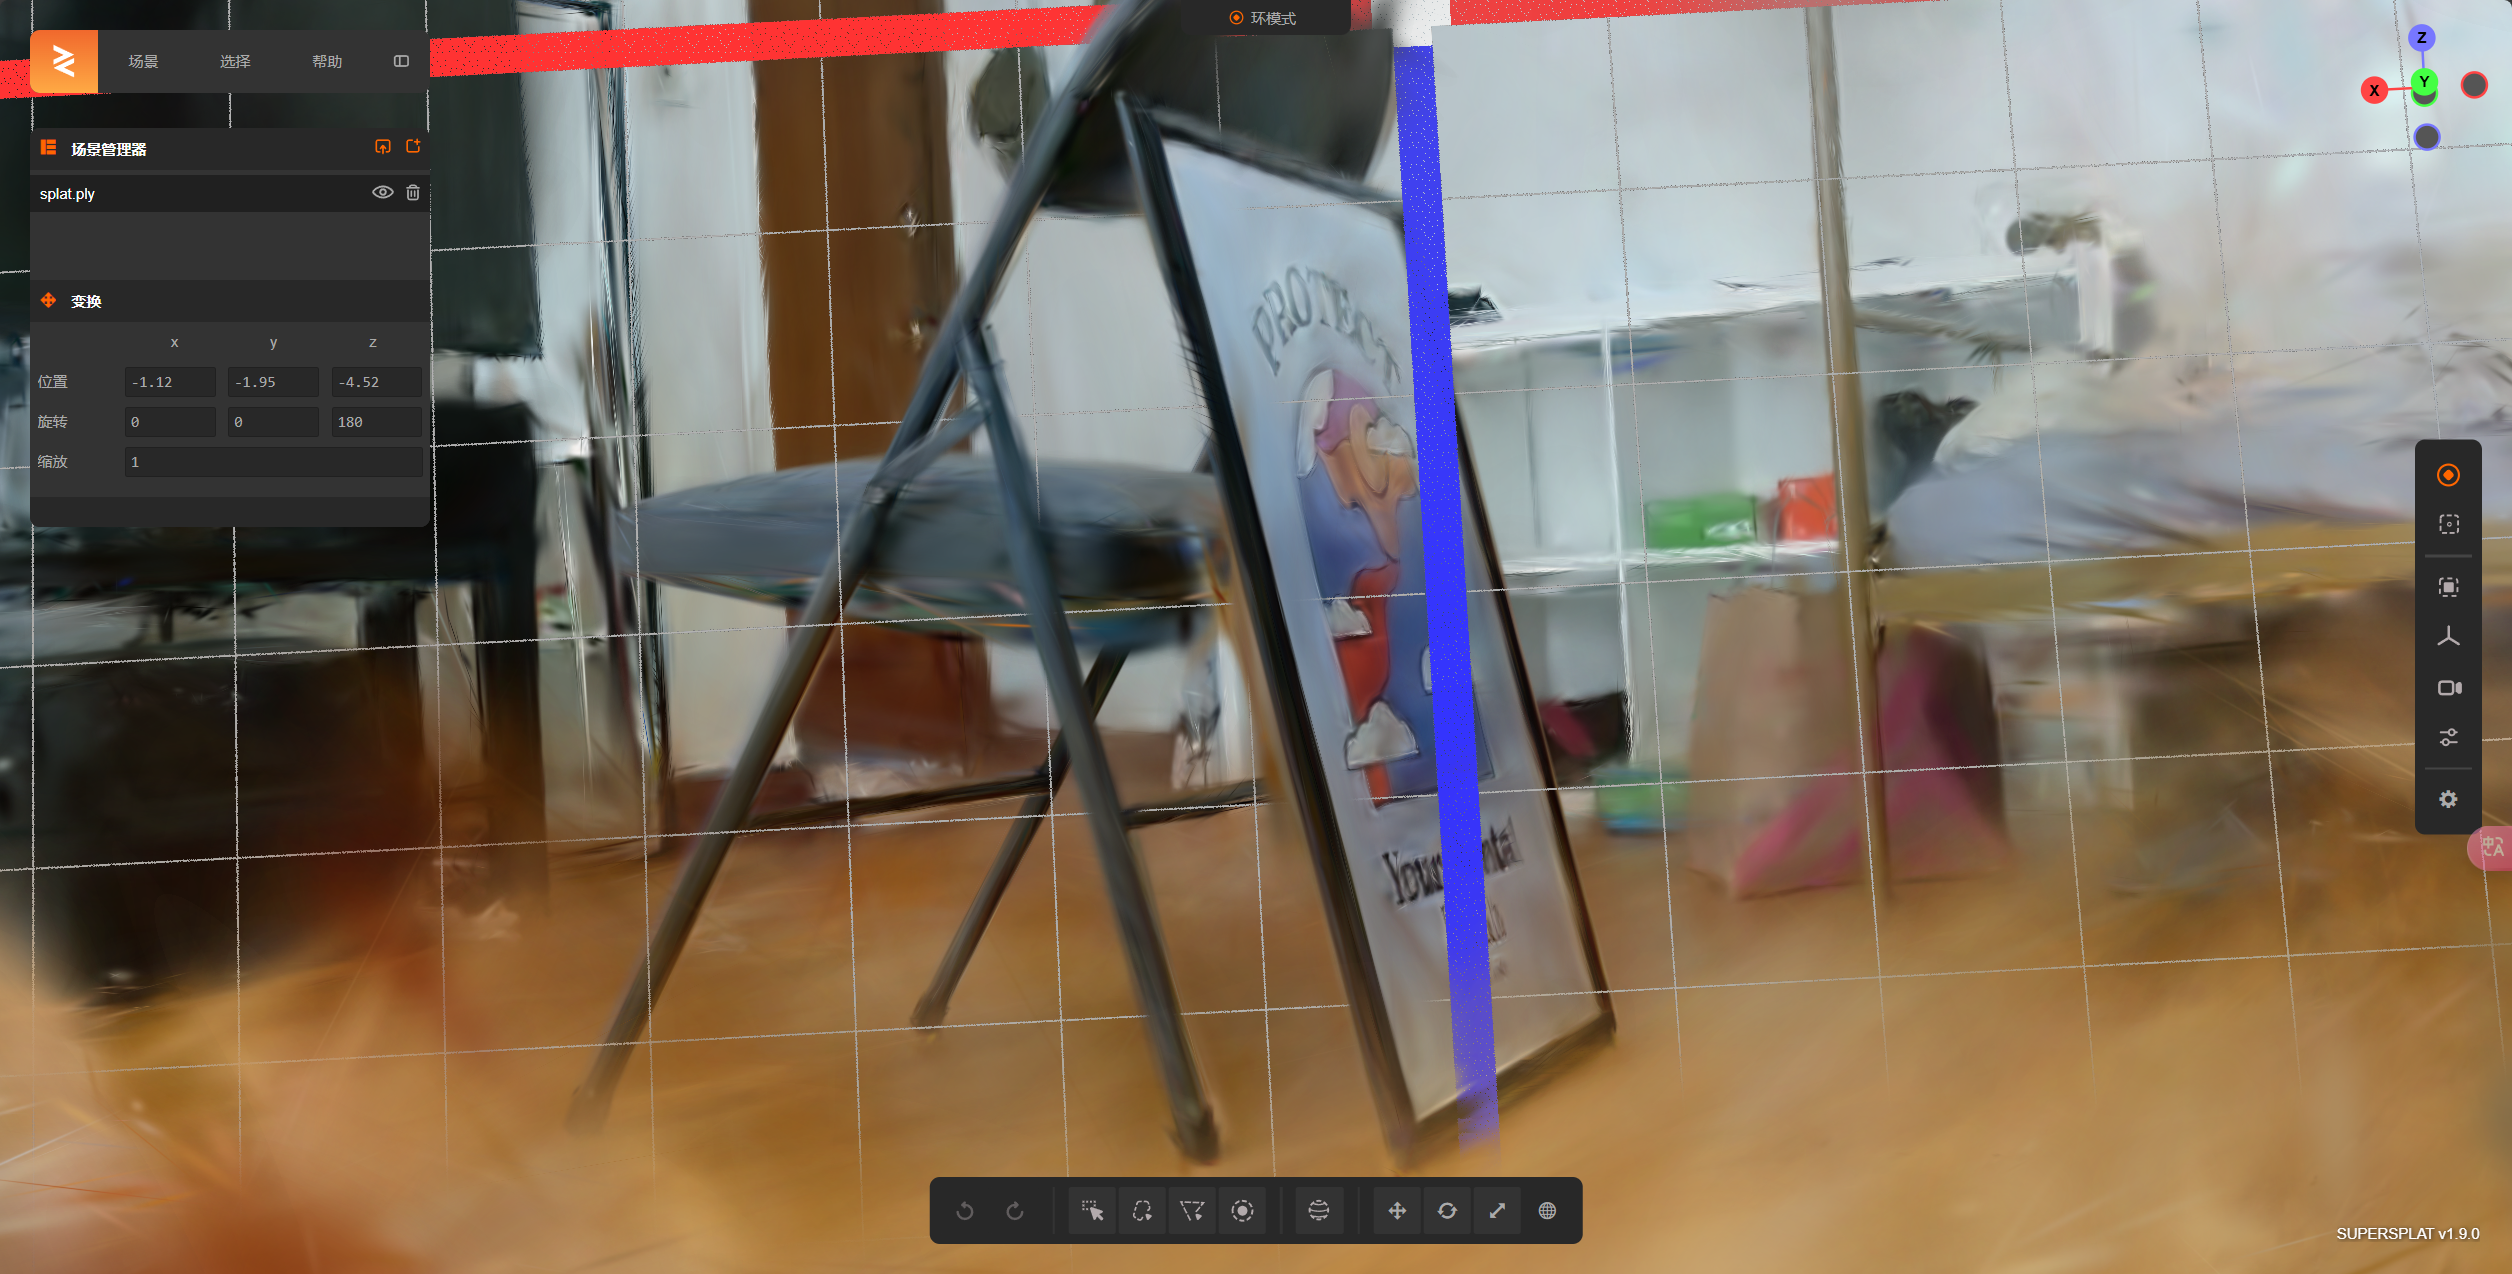
image-20241119133706308

将摄像头拉近到主体,发现这个重构效果还是蛮好的。然而如何将gaussian splat转化为网格形式,这是后续工作的重点。

Mesh导出

NeRF Studio中可以对训练结果进行可视化的导出。支持3D gaussian, point cloudmesh ,但是对于不同的方法,导出的格式不同。如基于NeRF的方法只能导出点云和网格,而基于3DGS的方法只能导出三维高斯。

训练代码示例:

1
ns-train nerfacto --data data/processed_truck/ --output-dir outputs/truck_100000 --max-num-iterations 100000

可以先对训练结果进行可视化:

1
ns-viewer --load-config path/to/your/trainresult/config.yml

然后在网页的export栏可以选择导出参数,并复制导出指令,以possion的导出为例:

1
2
ns-export poisson --load-config outputs/truck_100000/processed_truck/nerfacto/2024-11-26_142623/config.yml --output-dir exports/mesh/truck_100000iter_50000face --target-num-faces 50000 --num-pixels-per-side 2048 --num-points 1000000 --remove-outliers True 
--normal-method open3d --obb_center 0.0000000000 0.0000000000 0.0000000000 --obb_rotation 0.0000000000 0.0000000000 0.0000000000 --obb_scale 1.0000000000 1.0000000000 1.0000000000

还可以选择其他的导出方式,如tsdf

1
ns-export tsdf --load-config outputs/truck_100000/processed_truck/nerfacto/2024-11-26_142623/config.yml --output-dir exports/mesh/truck_100000iter_50000face_tsdf --target-num-faces 50000 --num-pixels-per-side 2048

或者marching-cubes

1
ns-export marching-cubes --load-config outputs/truck_100000/processed_truck/nerfacto/2024-11-26_142623/config.yml --output-dir exports/mesh/truck_100000iter_50000face_tsdf --target-num-faces 50000 --num-pixels-per-side 2048

(好像nerfacto的结果不能用marching-cubes

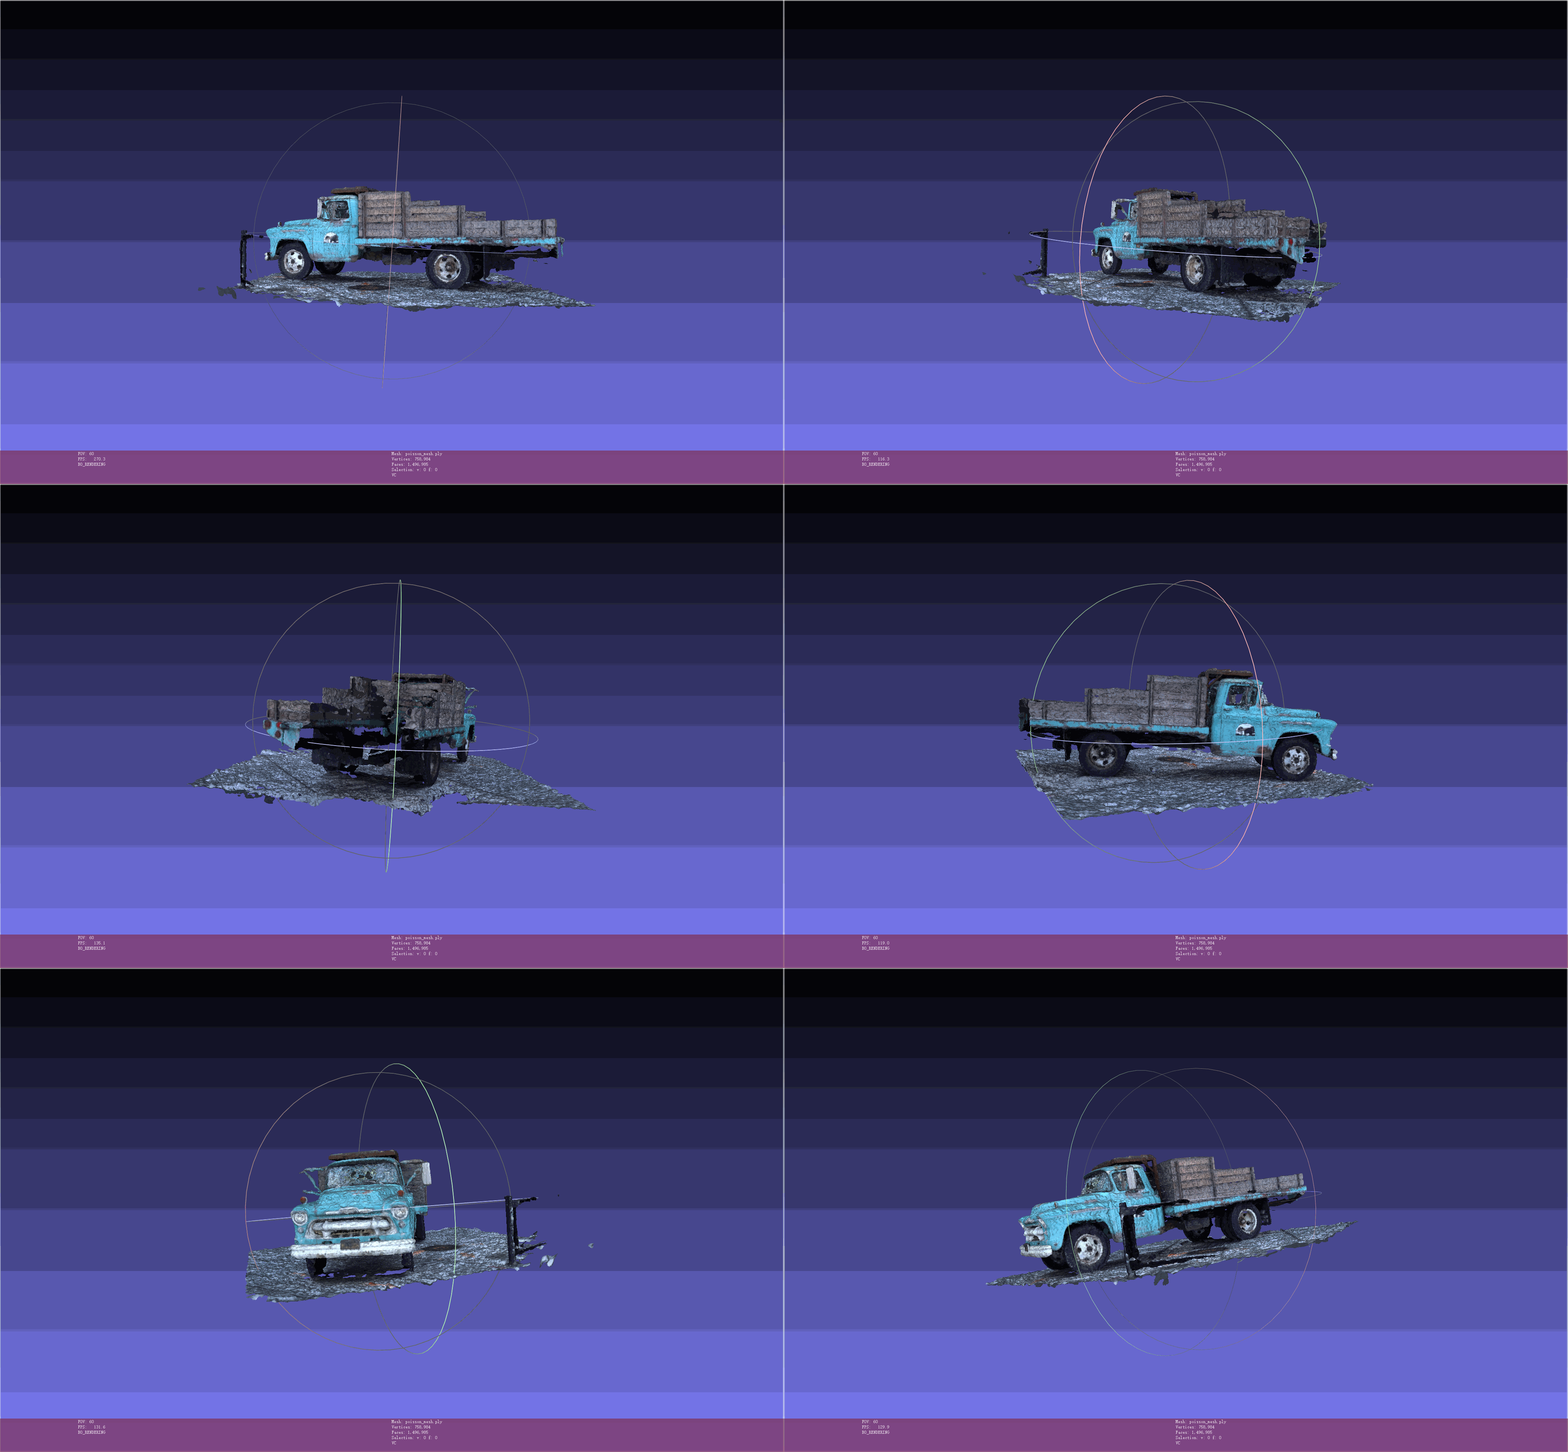
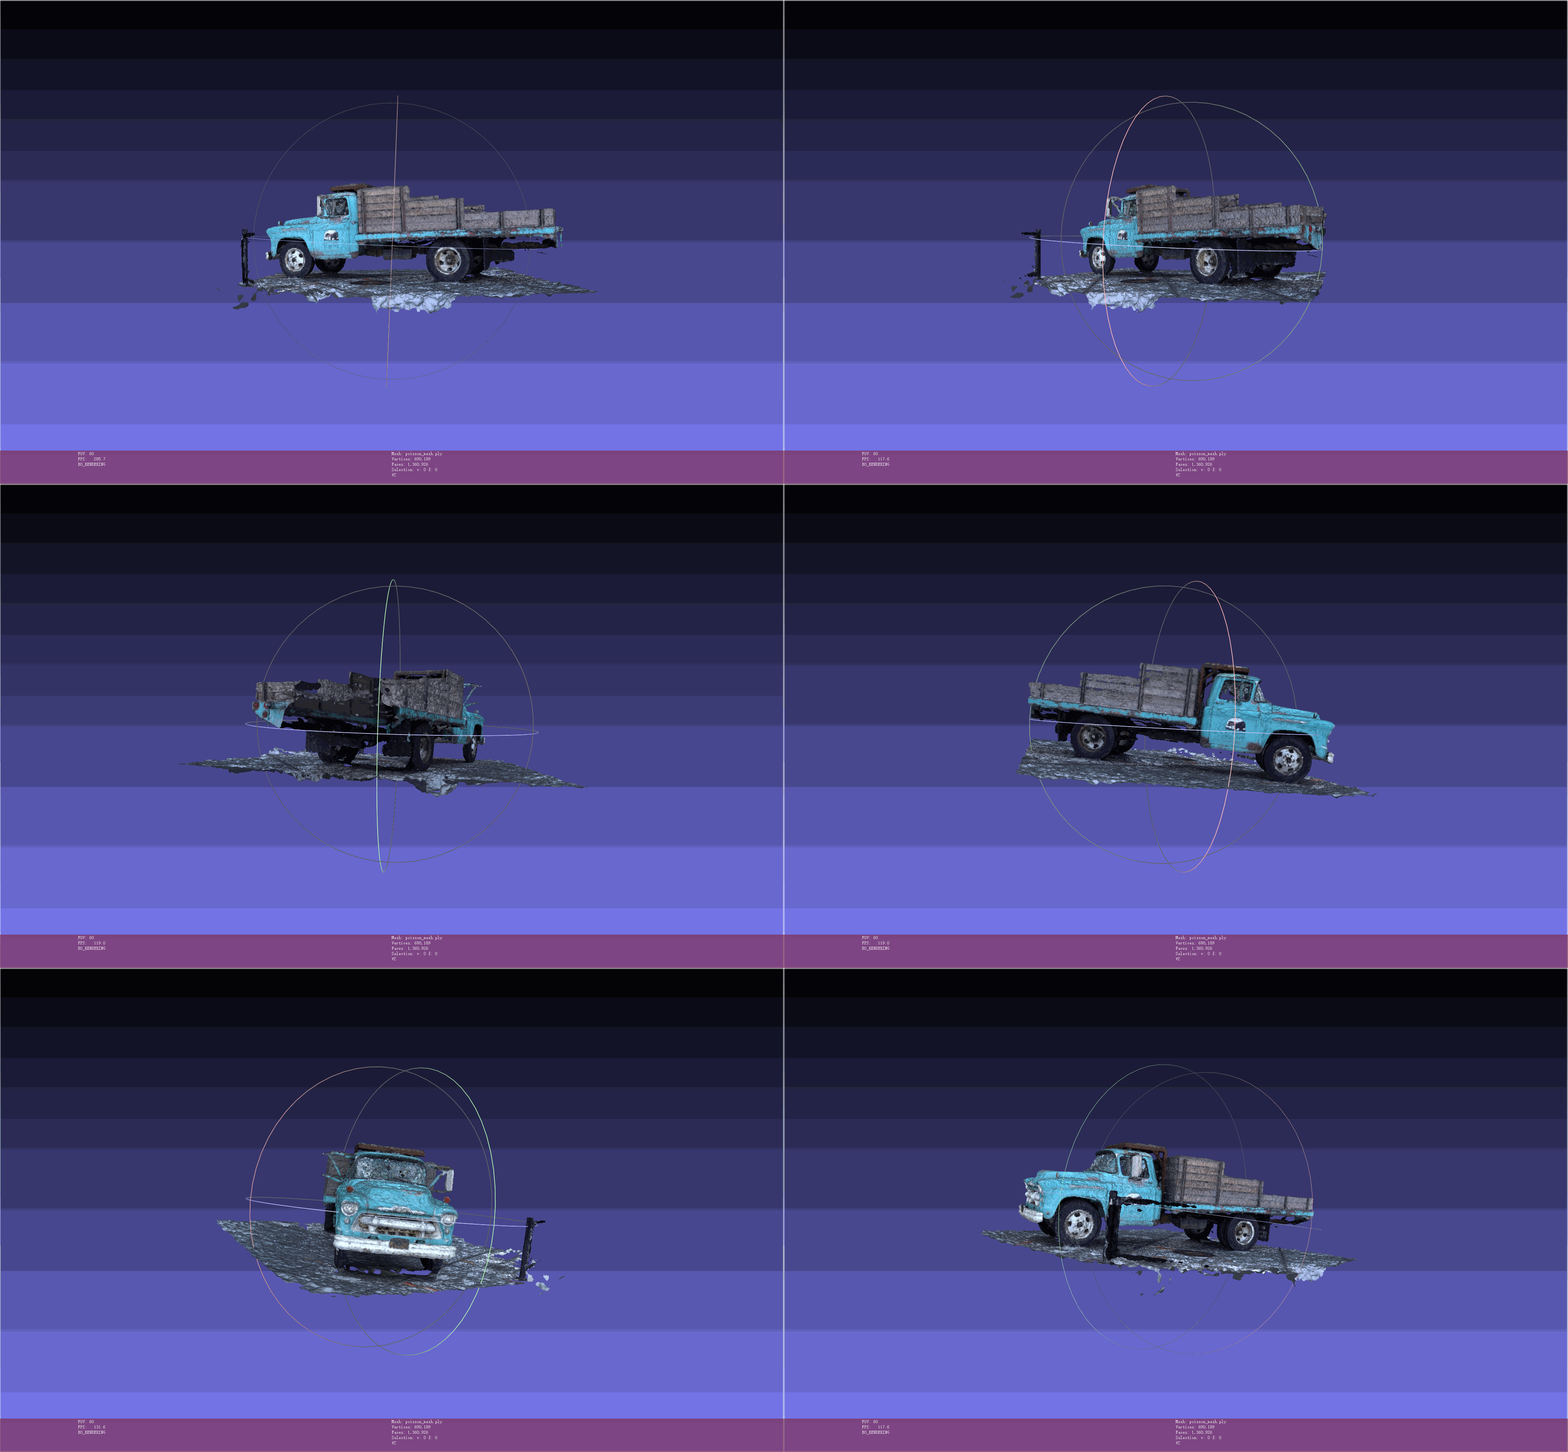
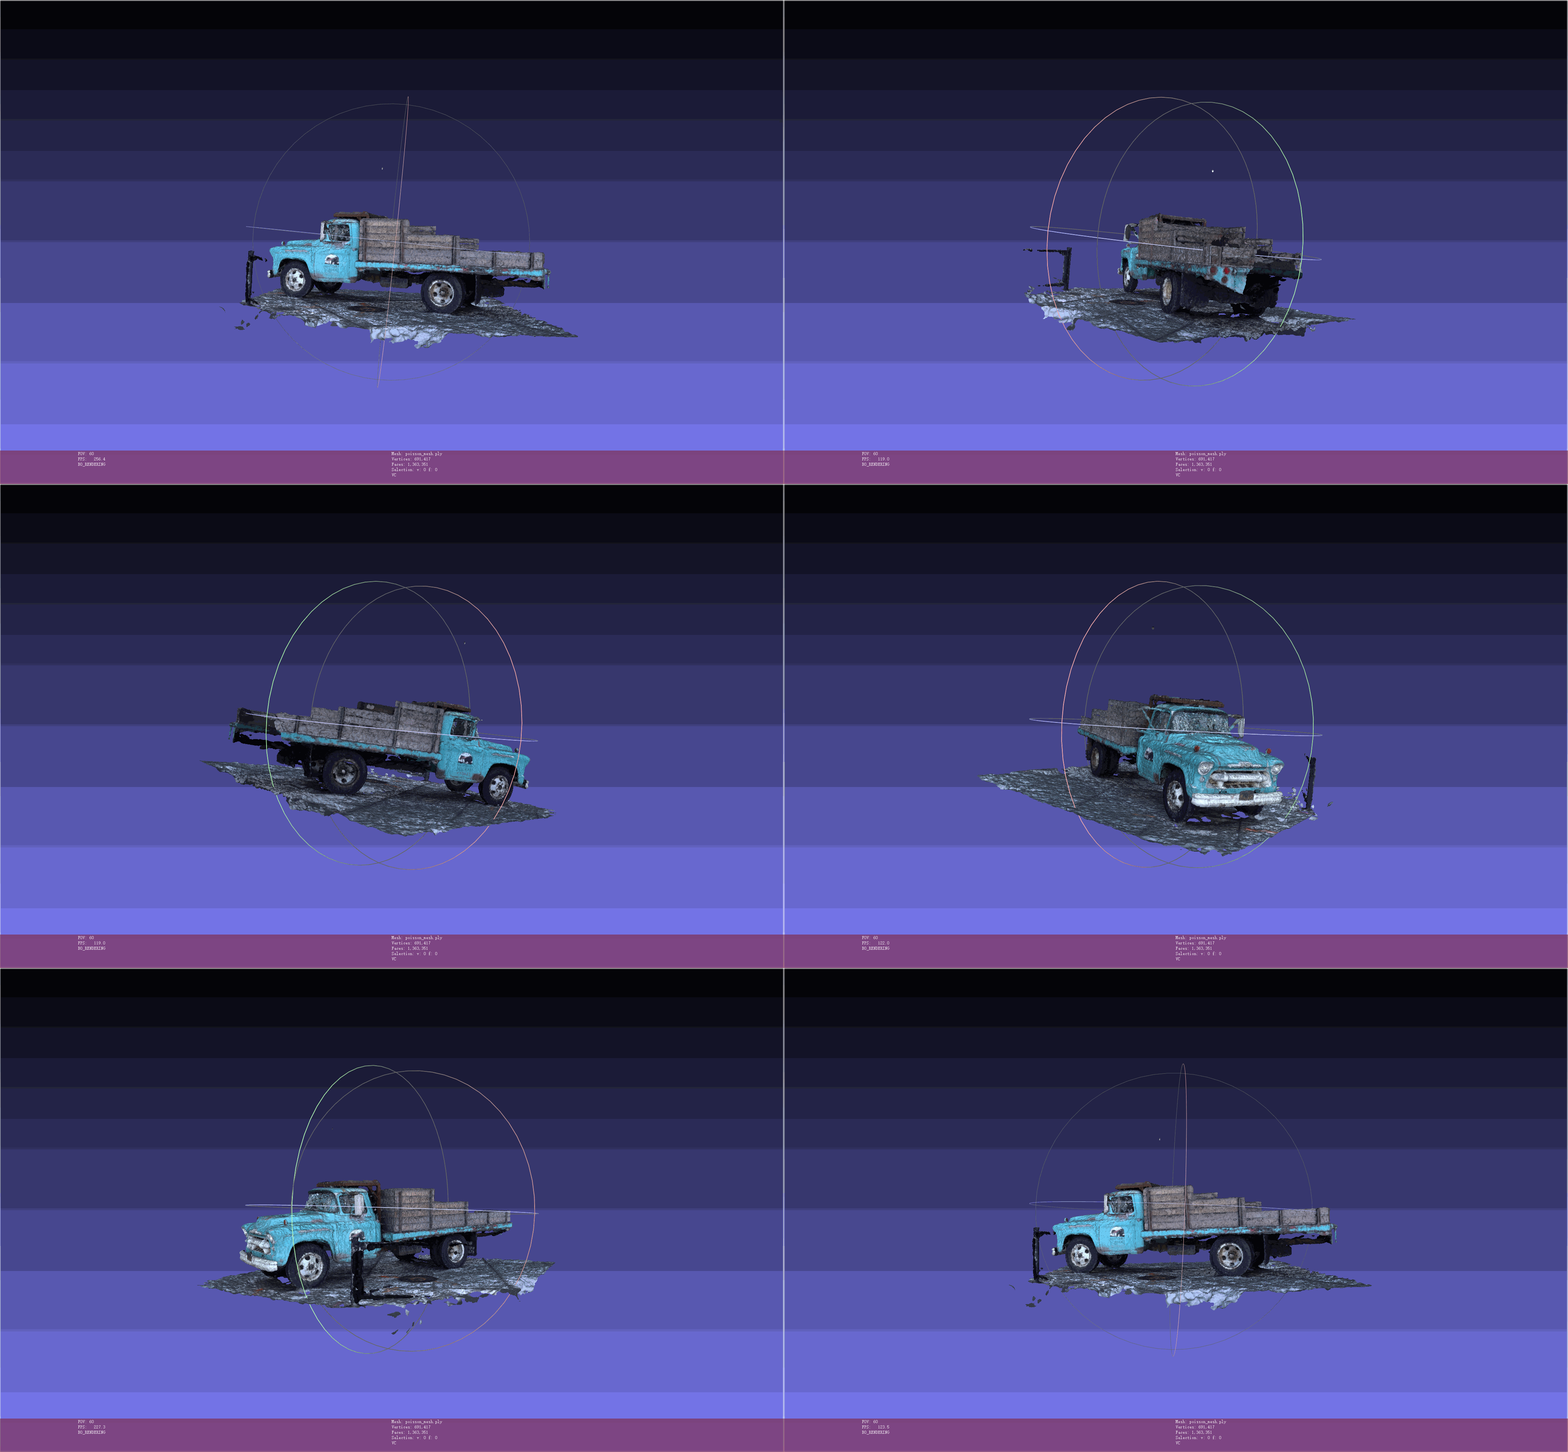
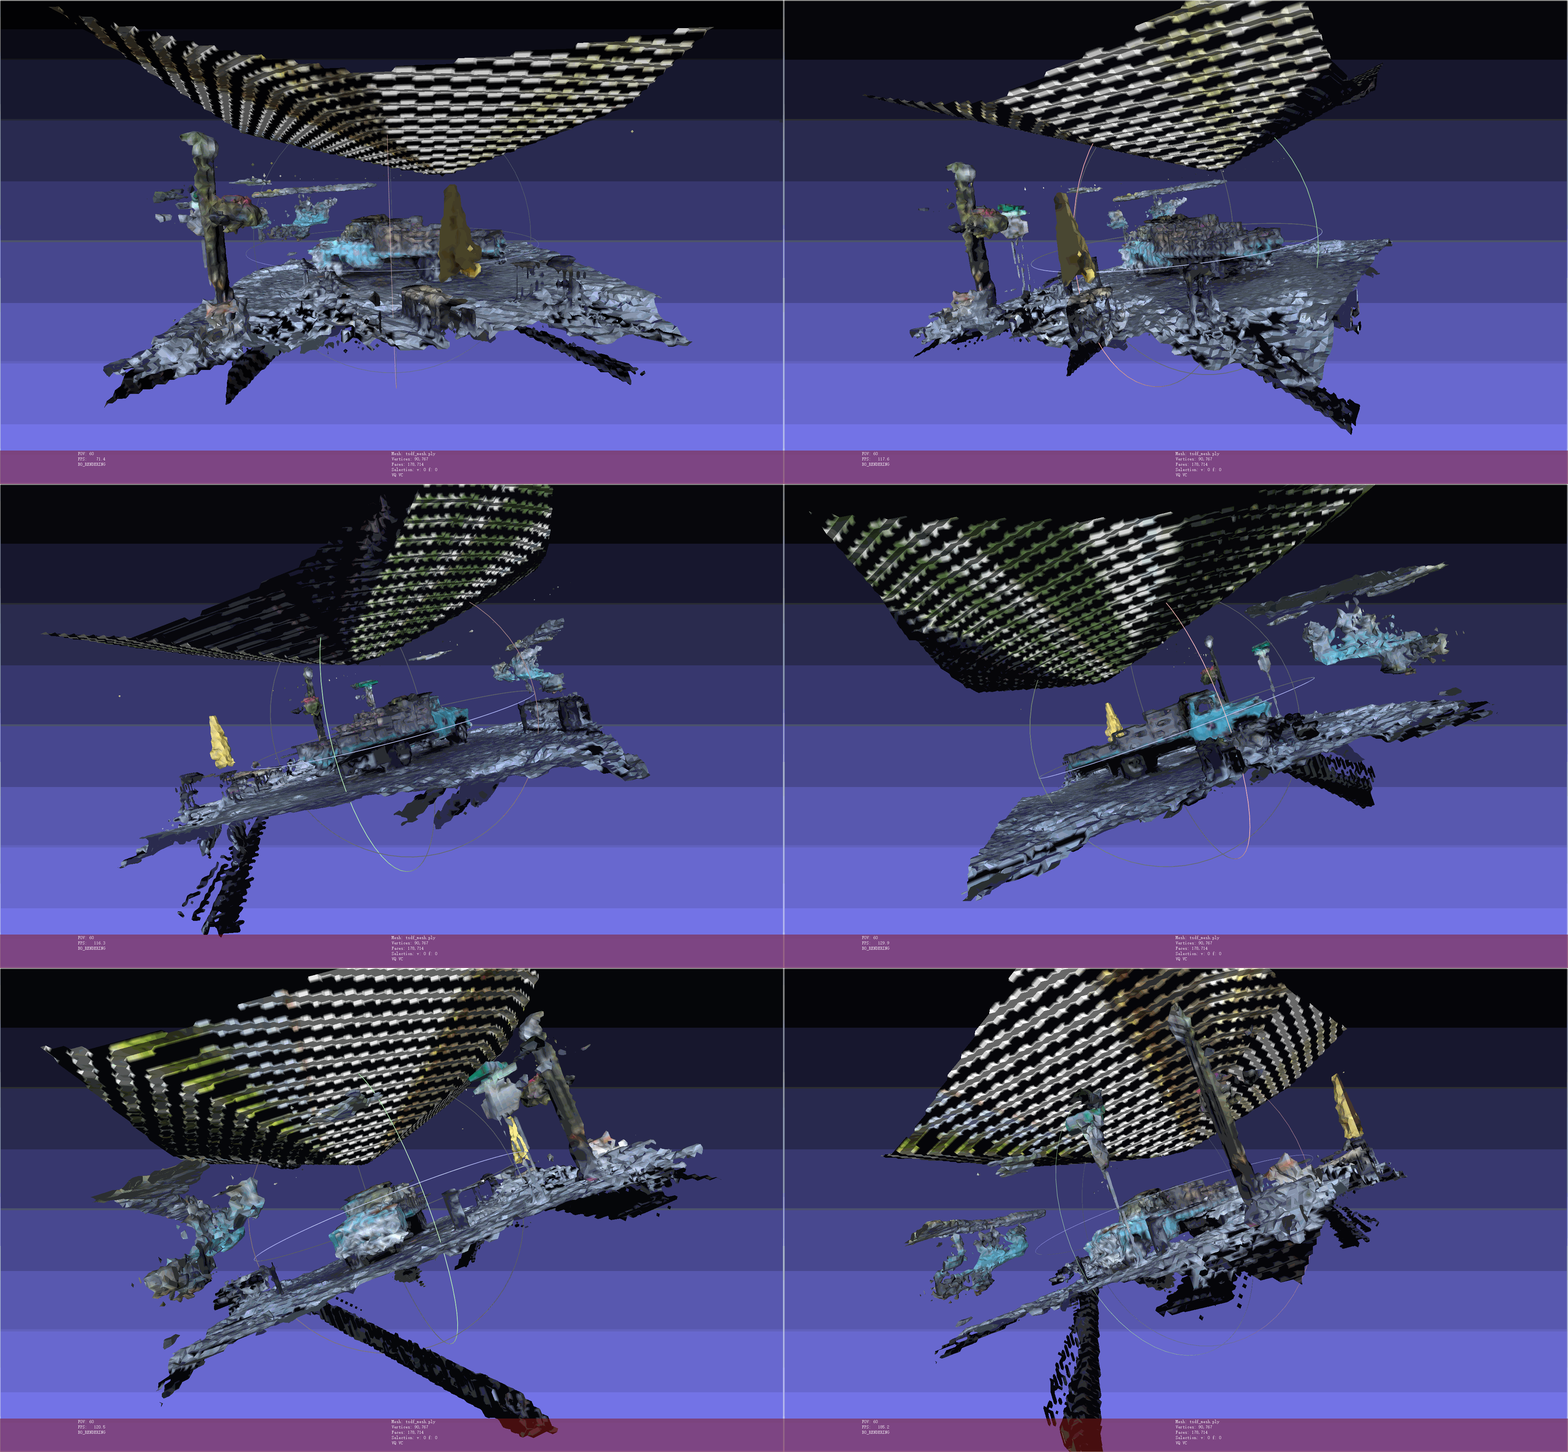
下面直观展示下导出mesh的效果(前四种是nerfacto,最后一个是用2DGS方法生成的结果):

possion (30k iters, 50k faces)2024-11-26-17-05-29
possion (100k iters, 50k faces)2024-11-26-17-06-26
possion (100k iters, 100k faces)2024-11-26-17-08-08
tsdf (100k iters, 50k faces)2024-11-26-16-52-37
2DGS (2m faces)2024-11-26-16-52-37

可以看到,tsdf提取的网格质量过低,而possion提取的网格相较而言则更精确。总体而言,对于nerfacto方法来说,iteration的提升貌似没有对最终的网格产生比较大的改善,30k的迭代次数已经足够,而face的增加其实也显得不是很必要,50k的面数已经足够表达一个复杂的结构体了。对于2DGS,由于它没有整合到NeRF Studio里,它的重建没有固定面数,最终生成了2m的面,虽然重建效果好很多,但是对计算负载的压力更大。

  • 标题: NeRF Studio简要教程
  • 作者: Felix Christian
  • 创建于 : 2024-11-12 19:27:05
  • 更新于 : 2024-12-10 17:28:55
  • 链接: https://felixchristian.top/2024/11/12/08-NeRF_Studio/
  • 版权声明: 本文章采用 CC BY-NC-SA 4.0 进行许可。
评论